$ rm -rf ~/.config/nvim
$ rm -rf ~/.local/share/nvim
$ rm -rf ~/.local/state/nvim
$ rm -rf ~/.cache/nvimChapter 1. Introduction and Installation
This book is meant for all the developers out there who are intrigued by the power modal editing can bring, but are either intimidated or bored by the sheer amount of configuration that even introductory tutorials on the topic force upon them.
I’m guessing you’re a Visual Studio Code user (a great editor that I used for a few years) but you may be coming to modal editing from numerous other integrated development environments and code editors. You’ve probably heard of Vim and something made you want to try it out.
1.1. Why Vim
Vim has a very ancient history. It was created in the early '90s as an
improvement on the (much) older Vi editor, written in the 1970’s. The name
“Vim” actually stands for “Vi, improved”. Its predecessor, Vi is short for
“Visual”, as it was an iteration on an even earlier (1971) non-visual line
editing experience called ed.
Interestingly, ed is somehow still available on modern Unix systems, and if
you use a MacOS or Linux environment, you can probably access it by typing ed
in any terminal. (If you made the mistake of trying it, Control-D will get you
out again). You now know as much as I do about ed, and trust me, you don’t
want to know more. |
You may also be familiar with another iteration of ed called sed, the "stream
editor." To this day it is still used for modifying text in a shell pipeline.
The ed command was also extended to create another line editor called ex,
which isn’t really used anymore, except (extensively) as a submode of Vim.
In fact, if you install Neovim and type ex on your command line, you will
get a very crippled instance of Neovim that only supports ex commands.
So that’s quite the family tree, but ancestry alone is not a great predictor of quality, as any fourth generation somebody can attest.
There are many reasons to use any one editor, but the ones that stand out for Vim are:
- Health Benefits
This is the big one for me. I used Vim a lot through my early career, though, like many developers, I switched to VS Code when it came out in 2015. I spend a lot of time at my keyboard, and by 2020, I was so crippled by RSI that I spent six months exclusively coding by voice (a blog article on the topic has made me more famous than I expected). A friend suggested I switch back to modal editing, and it made a huge difference. The vast majority of Vim keystrokes do not require holding multiple keys with the same hand, something that really aggravates carpal tunnel syndrome.
- Performance
Most IDEs have some sort of “vi emulation” layer or plugin that allows you to reap some of the health benefits of modal editing without fully switching to a new editor. But waiting for VS Code to start up and load all the extensions you know and love has become a meditative exercise for many (or an opportunity to return to doom scrolling). In contrast, when I load my LazyVim configuration, it helpfully tells me how long it took to load: 56.98 milliseconds. To my slow, human eyes, it’s instant.
- Developer Velocity
This is debatable and subjective. Any tool is only as good as the trades-person who wields it, and I certainly know excellent coders who can really fly with their VS Code, Emacs, or JetBrains configurations. Still, I really believe that a finely-tuned Vim configuration can outpace any of them.
- Open Ecosystem
I have a lot of respect for how Microsoft treats open source software since Nadella took the reins, but VS Code is showing increasing signs of proprietary lock-in (especially with its AI integrations). In contrast, the Neovim ecosystem is a vibrant open community, and innovative plugins arrive every week that would never be attempted in VS Code.
1.2. Why Neovim, Specifically
If you decide to use Vim, you’ll quickly discover that there are two modern variations: Vim, and Neovim. Both are direct descendants of that original open source '90s Vim code. Neovim was forked from Vim in 2014 with a vision of refactoring and modernizing the codebase and feature set.
Both are actively maintained and both have the potential to feel polished and modern, though it takes some configuration to reach that potential. They each have extremely strong plugin ecosystems, but Neovim has one killer feature: It has introduced the Lua programming language for plugin development (and configuration) in addition to the native VimScript that its sibling uses.
By itself, Lua doesn’t make Neovim inherently better than Vim. However, where most Vim plugins also run on Neovim, the inverse is not always true, and there are best-in-class Lua plugins that only work with Neovim.
For the purposes of this book, your decision is already made for you: The LazyVim distribution this book is about only works with Neovim.
1.3. Introducing LazyVim
The chief drawback of both Vim and Neovim is that while they have the
capability to have the same (or better) modern editing experience as any other
IDE, they don’t start out that way. Vim has a long tradition of maintaining
compatibility with the outdated vi tool and Neovim has only marginally
diverged from that tradition. When you first install Neovim, you get a pretty
bland code editing experience.
When I switched back to Vim in 2020, after becoming used to the great functionality VS Code brought to the editor ecosystem, it took me two weeks to get my configuration where I wanted it and I tweaked it incessantly for months after. It came in at about 300 lines of Vimscript, which I later ported to around 250 lines of Lua code. To be fair, I’m a heavy customizer in general, and my VS Code configuration was actually longer than either of those! But I’ll happily admit that the VS Code out-of-the-box experience was much better.
I looked at several so-called Neovim “distributions” (preconfigured setups). I won’t go into details of the comparison, but LazyVim is the clear winner by far, mostly because it balances a dead simple out-of-the-box experience with relatively easy customization and configuration.
To be clear, LazyVim is Vim. The editing experience is identical. It’s not a new iteration or version of Vim in the way that Neovim is. Instead, LazyVim is a mindset; it starts with an agreement on what constitutes the best plugin configurations for modern development, and a configuration that makes them work well together (keeping different plugins' keybindings from conflicting with each other is one of the major pain-points when managing editor configurations manually).
But if you go into using LazyVim with the mindset that this experience will be better than any other editing experience you’ve worked with before, and accept that you will be retraining some keyboard muscle memory, you will find that it is extremely well thought out. In my experience, it is exactly what a 2020s-era modal editing experience should be.
1.4. Choosing a Terminal
If you’ve made it this far, you probably think you’re ready to install Neovim. Actually, you still have one decision to make.
Neovim can run in a lot of different contexts (you can even run it inside Visual Studio Code!) By default it is a terminal program, but there are also tons of GUIs available. I have tried almost all of them, and, honestly, I don’t think the GUIs have any inherent advantage over running Neovim directly in the terminal.
We will briefly discuss hooking up Neovim to a few GUIs much later in the book, but for starting out, I recommend running Neovim in a terminal. A very good terminal, to be specific.
To get the best Vim editing experience, you want a GPU accelerated terminal. What’s that mean? Basically that you will be using the chip designed to render photo-realistic video games for rendering source code. Makes as much sense as using it for artificial intelligence, right?
You will need to do your own research on the following options, so ask your favourite search engine or the AI Chat bot de jour to help you decide:
- Kitty Terminal
is my personal preference. I find it well-documented, easy to configure, and fully featured. If you need a specific recommendation, start with Kitty.
- Alacritty
is probably the winner for raw speed, but configuration is awkward, and it is less featureful.
- Wezterm
has some very nifty features, but I found the documentation to be lacking and had trouble getting some aspects to work.
- Windows Terminal
if you are a Windows user, does claim to be GPU accelerated, though I found that Neovim was occasionally unresponsive in it.
- Warp Terminal
If you’re already on the Warp train and you just can’t live without it, Neovim will work inside it. I found the experience a little choppy, and I didn’t enjoy the look and feel of Warp (or the fact that I needed to sign in to use it).
So install one or more of those until you find one that you like. You can use other terminal emulators if you want to. You probably won’t even notice that the experience is inferior, but I can promise that if you later switch to a GPU-accelerated experience, you’ll notice the improvement.
1.5. Setting Up Your Terminal Font
LazyVim and its plugins look beautiful in a terminal, and you would almost not believe that they are not a GUI application. To do this, they depend on special fonts that have a TON of glyphs for coding related things. Most notably, this gives you access to icons representing the type of file you have open, but it also provide nice frames and window-like look and feel in the terminal.
To get the best LazyVim experience, you will need to install one of these special fonts and configure your terminal to use it. Indeed, you should really be using one of these fonts in your terminal even if you aren’t a heavy Neovim user. A lot of modern terminal apps (there’s a phrase, eh?) look better if you have them installed.
Visit Nerd Fonts for more information. If you use Kitty,
you simply need to install the NerdFontsSymbolsOnly font, and it will automatically
pull symbols from that font if it can’t find them in your configured monospace
font. For other terminals, you will likely need to install and configure a "patched"
font as discussed on the Nerd Fonts site. There are many to choose from.
You can choose from many of the most popular programming fonts. Downloading and installing them is very much operating system dependent, so I’ll leave the guide on the Nerd Fonts website to explain it to you.
1.6. Install Neovim
Neovim works pretty much anywhere software can be installed, and it only relies on standard system dependencies. The chief problem is that no matter which operating system you use, you are spoiled for choice!
You can visit the Neovim home page and click the “Install Now” button to get the latest instructions for your operating system of choice (or of necessity) from the Neovim developers.
1.6.1. Which Version Should I Install?
Neovim development happens at a super fast pace compared to their release cycle, so it is not uncommon for folks to run the latest nightly build. I have only rarely encountered bugs in builds cut from the master branch on Github, so it’s generally safe. I usually run off the latest stable release when it comes out, and then when some new plugin update says “here’s a cool feature if you use Neovim nightly,” I’ll install the latest Neovim build instead.
I suggest starting with the latest stable version of Neovim for now, which at time of writing is 0.11.0. Avoid older instances if possible. LazyVim does tend to add features from the nightly release, so if you start to get as excited about this distro as I am, it will be a perfectly natural progression to switch to the pre-release.
1.6.2. Windows
On Windows, I recommend using the Windows Subsystem for Linux (WSL) and doing all development in there. WSL is way outside the scope of this book, but it is well-documented by Microsoft and many online tutorials. Once you have chosen a WSL-compatible Linux distribution, set it up, and have it running in your chosen terminal, you can install Neovim using the Linux instructions below.
If you have a reason—or preference—to develop on native Windows, the easiest thing to do is grab the MSI installer from the Releases section of the neovim/neovim repository on GitHub.
If you already use Winget, Chocolatey, or Scoop to manage packages on your Windows machine, there is a Neovim package in each of them.
Note that if you use Windows without WSL, you will also need to install
a C compiler in order to get treesitter support (this basically means better
syntax highlighting and code navigation support). This is, sadly, not always
a trivial task. One reader suggests installing the neovim and zig (which
includes a C compiler toolchain) packages with Scoop. If that doesn’t work,
I suggest following the documentation in the
nvim-treesitter/nvim-treesitter
GitHub repo, so I won’t go into detail here.
1.6.3. MacOS
Most developers on MacOS use Homebrew so if you don’t have it already, I recommend installing it by following the instructions at brew.sh.
Once you have brew up and running, the command brew install neovim will
install Neovim.
If you want to live on the edge, brew install --HEAD neovim will install the
latest nightly version of Neovim, which is probably, but not guaranteed to be,
stable.
I find the brew experience to be much kinder than other MacOS installation options for Neovim, so if you aren’t already a Homebrew user, I strongly recommend setting it up. There are other open source tools that you will want to install as we get deeper into the LazyVim journey, and brew will be the easiest way to get them all.
If you don’t want to use Homebrew, things are a bit more annoying. The Neovim dev team doesn’t maintain a MacOS installer, so you’ll have to download a tarball and extract it, then link to the binary from somewhere on your system path. If you don’t know what any of that means, honestly, use Homebrew, it’s easier!
1.6.4. Linux
If Neovim isn’t available using your distribution’s default package manager, you have a very strange Linux distribution, indeed!
So just run sudo pacman -S neovim, sudo apt install neovim, sudo dnf
install neovim, or the appropriate command for whichever more esoteric package
manager you prefer.
Some distros ship with painfully outdated Neovim versions, though. If you want
a nightly version, you may find the instructions on the neovim/neovim GitHub
Releases page, or will have to dig into your distro’s documentation.
You will also need to install a C compiler in the unlikely event that your
Linux distribution didn’t come with one. For most distros, just install the
gcc package and you should be good to go.
1.7. Try Neovim Raw (If You Dare)
Once you have Neovim installed, you can try it out by simply typing nvim (or
nvim <filename> to open a specific file) into the terminal you installed a
few sections ago. If Neovim is installed correctly and on your path, you’ll get
a visually unappealing editor that looks like it was forked from something
written in the 90s and had the express intent of looking like it was written
in the 70s.
So, at least it’s honest?
Unfortunately, you’re now trapped. To save you the frantic “how do I exit Vim”
Google search, the command to quit is Escape followed by the three characters :q!
followed by Enter. The whole sequence will therefore be
<Escape> <Colon> q <Exclamation> <Enter>.
Seriously, “How do I exit Vim” is one of the top three autocompletes on Google for “How do I exit…”. Apparently only a Samsung TV plus and full screen mode on MacOS are less intuitive to get out of! We’ll understand why this incantation works after we dig deeper into the vim mental model and command mode.
If you want to, you can run the command <Escape>:Tutor<Enter> to
open an interactive text file that you can read through and edit while
learning the basics of Neovim. I do recommend doing this at some point, but
now may not be the right time. A lot of things that are “normal” in the
Vim tutor are different (better!) using LazyVim. The rest of this book does
not assume you have gone through the tutor. |
1.8. Install LazyVim
Now that you have Neovim up and running, let’s get it configured to look like it was developed this century.
Installing LazyVim requires a bit of work with git. Since you are reading
this book, I am assuming you are a software developer and therefore somewhat
familiar with git.
The git commands to install LazyVim are more or less the same for the various operating systems, though paths and environment variables are slightly different.
1.8.1. Start With a Clean Slate
If you already have a Neovim config and you want to try LazyVim without
losing your existing configuration, set the NVIM_APPNAME=lazyvim environment
variable. Skip to the Clone the starter template section below, and
clone into ~/.config/lazyvim instead of ~/.config/nvim. If you want
to make the changes permanent, either set NVIM_APPNAME in your
shell’s startup file or rename that lazyvim config folder to nvim. |
First, remove or back up all existing Neovim state. This step is largely optional if you’ve never used Neovim before, but I recommend making sure the following directories have been removed or moved:
Clean up: Windows with WSL, MacOS, and Linux
Remove (or back up with mv instead of rm -rf) the following directories:
Listing 1. Unix Cleanup Commands
Clean Up: Windows Without WSL
The location of the config and data folders is a little bit different on Windows, but the idea is the same as for the Unix systems. Just use Powershell commands instead of the Unix core-tools:
Listing 2. Powershell Cleanup Commands
$ Move-Item $env:LOCALAPPDATA\nvim $env:LOCALAPPDATA\nvim.bak
$ Move-Item $env:LOCALAPPDATA\nvim-data $env:LOCALAPPDATA\nvim-data.bak
1.8.2. Install Other Recommended Dependencies
I strongly recommend installing lazygit, ripgrep and fd, which are used
by LazyVim to provide enhanced git, string searching, and file searching
behaviours. Most operating system package managers will have these available
for trivial installation. You can find more specific installation instructions
on their respective GitHub repositories:
1.8.3. Clone The LazyVim Starter Template
You’ll use a git clone command to download the starter template and copy it
into the user config directory for Neovim, then remove the .git folder.
The starter is just that: a starter. So you won’t ever need to pull changes from this repo. Instead, LazyVim will manage updating itself and all its plugins for you. The only reason the starter is a git repo is that it’s easy for the LazyVim maintainers to maintain. From your point of view you’re just downloading the current state of the repo and don’t need to know about the past or future state.
Clone Starter Repository: WSL, MacOS, and Linux
On Unix systems, use these commands:
Listing 3. Unix Clone Starter
$ git clone https://github.com/LazyVim/starter ~/.config/nvim
$ rm -rf ~/.config/nvim/.git
Clone Starter Repository: Windows without WSL
On native Windows, use these commands:
Listing 4. Powershell Clone Starter
$ git clone https://github.com/LazyVim/starter $env:LOCALAPPDATA\nvim
$ Remove-Item $env:LOCALAPPDATA\nvim\.git -Recurse -Force
1.9. The Dashboard
Ok, you have completed the most difficult section of this book and you’re
finally ready to start LazyVim! Use the same terminal command as before:
nvim.
You’ll see a flurry of activity as LazyVim sets everything up and downloads the
plugins it thinks are essential. You may see it compile and install a bunch of
treesitter grammars; if you see a message to “Show More” use G (i.e.
Shift+g) to skip to the end.
Once everything is installed, you’ll see a summary of the plugins that were
installed inside a window managed by a plugin called Lazy.nvim that we will
discuss shortly. For now, once you get to the Lazy.nvim screen, you can press
the q key. The plugin will interpret this as “quit Lazy.nvim” and the window
will close.
Now you can see the LazyVim dashboard, which is the first thing you’ll see every time you start LazyVim in the future. It’s a little more friendly than the out of the box Neovim experience:
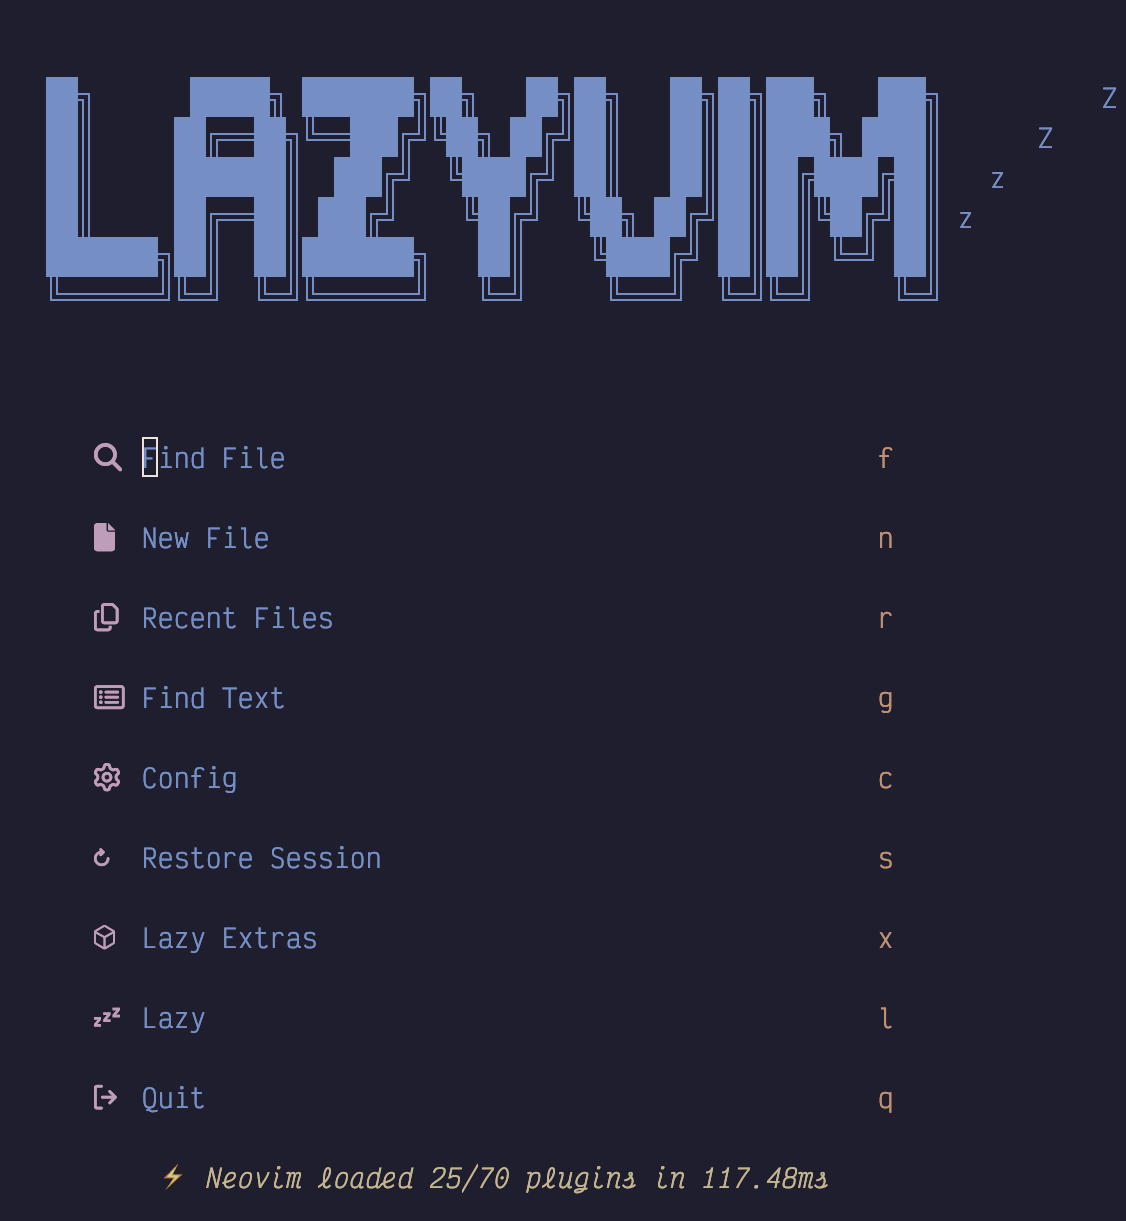
Figure 1. LazyVim Dashboard
As you can see, there are several commands that allow you to interact with the
dashboard via a single keystroke. Most importantly, of course, is the q
keystroke to quit!
Most of these options are self-explanatory, but we’ll discuss a few of them more deeply in later chapters.
1.10. Lazy.nvim Plugin Manager
When you first open LazyVim, it checks for any plugins that are available to be updated, and gives you an overview in a message notification that will look something like this:
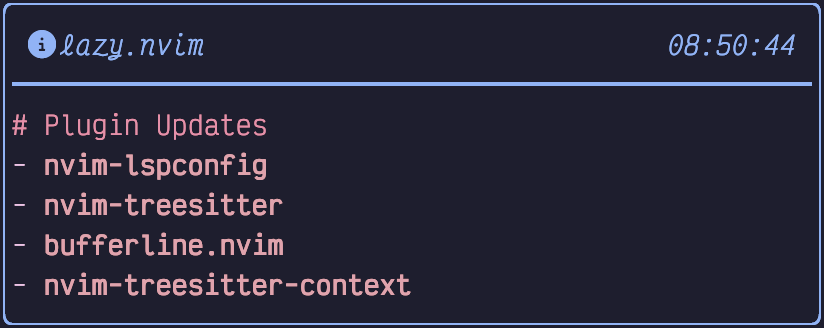
Figure 2. Plugin Update Notification
Because Neovim is pretty barebones by default, LazyVim ships with a ton of useful plugins ready to go. And there’s a good chance they are out of date because plugin development in the Neovim world happens at a ridiculously fast pace.
In the old old days, plugin management was a completely manual process. In the less old, but still old days, it was managed by a variety of plugins that did the job but felt like they were lacking something.
Then came the plugin manager called Lazy.nvim, created by the same person that later created LazyVim. The Lazy.nvim plugin manager should not be confused with LazyVim itself, though both are maintained by the same person. Lazy.nvim is strictly a plugin manager, whereas LazyVim is a collection of plugins and configurations that ship together. One of those plugins is Lazy.nvim.
Lazy.nvim has a ton of slick features, most notably loading plugins only when needed (hence the name “Lazy”) so that your editor is lightning fast to start up. It also has a nice UI for managing plugin installation and updates.
You can access this UI from the dashboard simply by pressing the l key, which
is labelled in the dashboard as Lazy. The label should probably be Lazy
Plugin Manager to make it a bit clearer, but now you know what Lazy means so
you won’t forget.
If you are not actively displaying the dashboard, you can show the plugin
manager at any time by entering Space mode. We’ll cover Space mode in detail in
the next chapter, but for now: First make sure you are in Normal mode by
checking the lower left corner of the active window. If not, press Esc to
enter Normal mode. Then press Space to enter Space mode, followed by l to
bring up the Lazy.nvim plugin manager.
(Don’t worry, those keybindings will all be second nature within a week.)
The Lazy.nvim plugin manager interface looks like this:
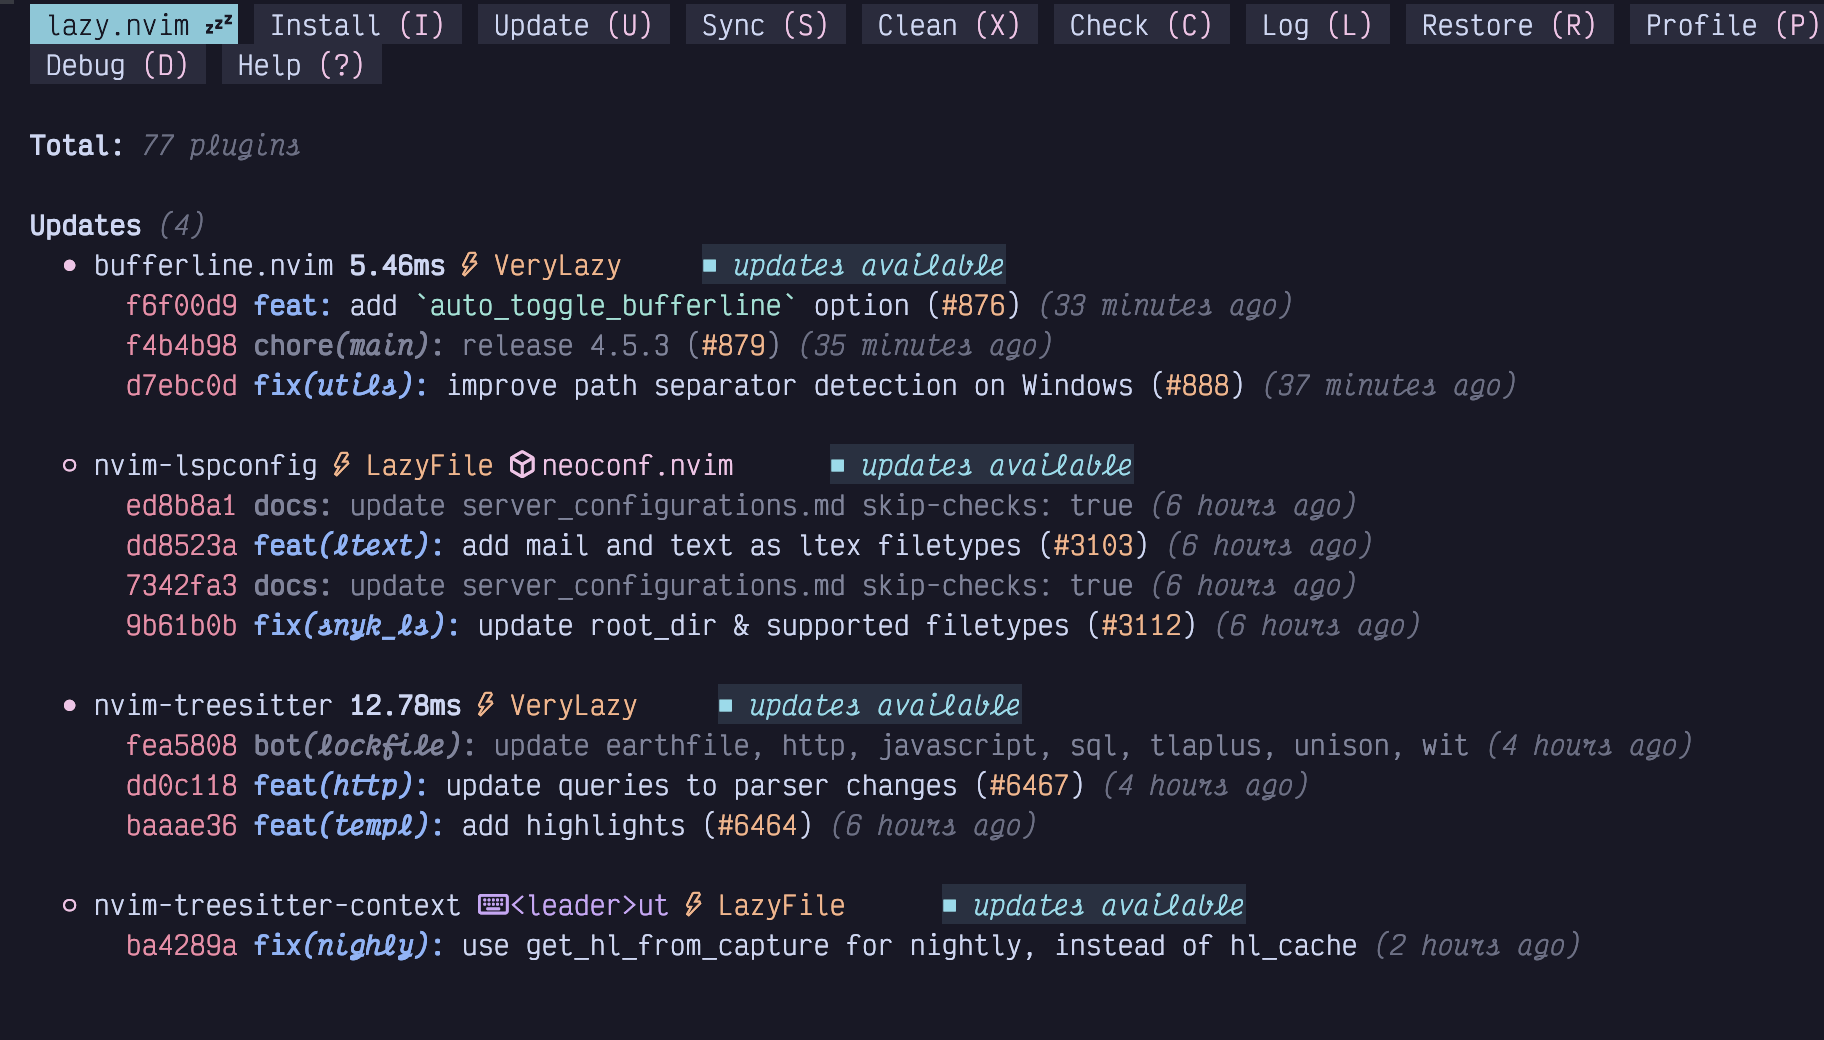
Figure 3. Lazy.nvim Plugin Manager
The window that has popped up is called a floating window. You’ll see these in
a few different situations, usually when there is interactive data that you
need to work with. This particular floating window comes with its own set of
keybindings. The keybindings are listed across the top, and pay attention to
the fact that all of them are capitalized, so you need to use the Shift key
when invoking them.
Typically, the only Lazy.nvim keybinding I use is S, for Sync. This is
equivalent to running install, clean, and update in a single action. It
guarantees that the versions of plugins that are actually installed are exactly
consistent with the ones specified in the LazyVim configuration.
So when the “Plugin Updates” notification pops up, just press
Space-l and then S and wait for the sync to complete. Then press q to
close the Lazy.nvim Plugin mode and floating window and return to what you were
doing.
1.11. A Note on Managing Dot Files
If you work on multiple different computers, you’ll quickly find that you don’t want to set up your LazyVim configuration separately on all of them. LazyVim does not have the equivalent of VS Code’s “settings sync”, though such plugins exist.
The alternative I recommend is to store your config files in a git repository.
You’ll probably find there are a few other files you want to keep in there such
as your terminal’s config file, your .gitconfig and .zshrc / .bashrc /
.config/fish/config.fish.
If you use GitHub Codespaces, you may already manage some dot files with git. If not, my personal recommendation is to follow the advice in the excellent blog article Dotfiles: Best way to store in a bare git repository from the Atlassian blog.
Before distributions like LazyVim came along, it was very common for people to store their Vim configuration in a public repository, and borrow ideas from each other. This practice is not quite dead, and you can find my own dot files on GitHub in the dusty-phillips/dotfiles repository.
1.12. Summary
In this chapter, we briefly discussed the history of Vim, Neovim, and LazyVim, and why they are still relevant today. Then we covered the importance of GPU accelerated terminals and Nerd Fonts.
We figured out how to install Neovim and its dependencies under whichever operating system(s) you use, and finally, installed LazyVim from its starter template.
In the next chapter, we’ll discuss Vim’s core feature: Modal Editing, and dig into the many things you can do with your keyboard in LazyVim.